Integrating your YesInsights surveys into Mad Mimi is super easy. So I will quickly detail the steps you need to take to.
How to integrate YesInsights into Mad Mimi
If you’re in a rush, there’s a short video of what I am doing at the bottom. If you don’t want to scroll, use CMD-F and type in TL;DR 🙂
Step 1 – Create your Survey
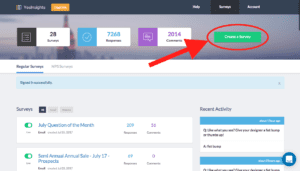
Sign into your YesInsights account and click “Create Survey”
Step 2 – Choose Survey Type
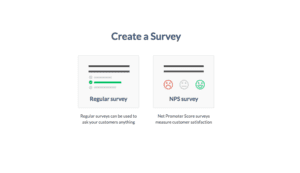
Click on which type of survey you would like to create.
I created a Regular survey for this How To Guide and the corresponding video. Don’t worry! You can follow the same process for setting up an NPS survey. It’s even easier!
Step 3 – Choose How to Share
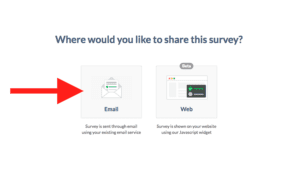
You will be prompted to select your distribution method after selecting your type of survey. Select Email since we will be integrating YesInsights with Mad Mimi.
Step 4 – Filling in the Survey Criteria
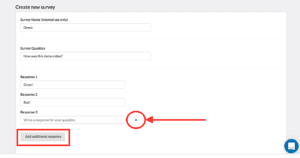
In this step, you’ll give your survey a name, ask your question, and enter in the responses. You can add more responses by clicking the “Add additional responses” button (in the red box above). And you can add as many responses as you’d like!
You can delete responses by floating your mouse over the Response box you wish to delete. This will make an “x” button appear to the right of the Response box (red arrow and circle above). Simply click that “x” and that response will be deleted.
Step 5 – Creating your Survey to Share
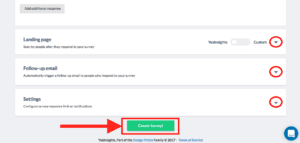
After filling in all the survey criteria, you will scroll down and select the green “Create Survey!” button.
Before hitting create, you will have the opportunity to switch your Landing Page, send a Follow-up email, and adjust your Settings. None of this is required. However, if you want to browse the possibilities, simply click on the arrow to the right (in the red circles above).
Step 6 – Selecting Mad Mimi
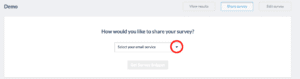
You will see this page after clicking “Create Survey”. To select Mad Mimi, click on the drop down arrow. It will load up a drop down menu of all the email platforms we integrate with in alphabetical order.
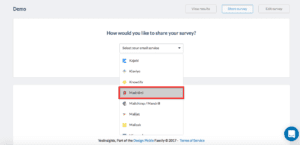
Scroll down until you see Mad Mimi (red box above) and select it.
Step 7 – Copying your Survey Snippet
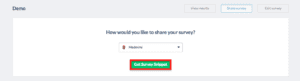
After selecting Mad Mimi, you will see the screen pictured above. You just need to click on the green “Get Survey Snippet” button (in the red box above).
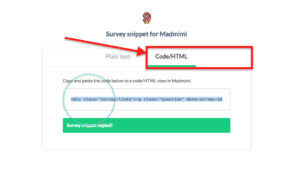
Next, click on the “Code/HTML” tab (in the red box above). Then, all you need to do is click anywhere inside the survey snippet box. I added the blue and green mouse capture so you could see that a simple mouse click will save it to your clipboard!
You will see the green “Survey snippet copied!” pop-up right after you click on the survey snippet.
Step 8 – Paste Survey Snippet into Mad Mimi
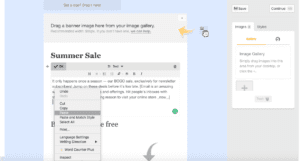
Next, head over to your email in Mad Mimi and paste your survey snippet. The paste shortcut (CMD-V) is your friend here 🙂 Your survey will just look like code to you, but you will be able to see what it will actually look like when you preview it 🙂
Which brings me to the last step…
Step 9 – Double Check (optional)
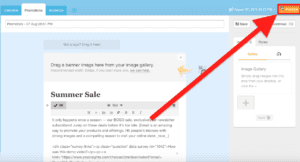
Personally, I like to double check that the surveys are functioning properly. To double check your survey, click the orange “Preview” button (in the red box above). Your preview will look something like this:
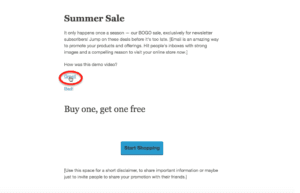
Next, answer your survey. Answering will take you to the YesInsights landing page where responders will be prompted to add additional questions.
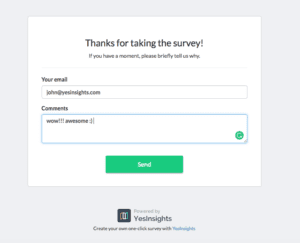
Fill in your additional comments on the YesInsights Landing Page and click the green “Send” button. After this, you’ll want to go back to your YesInsights dashboard.
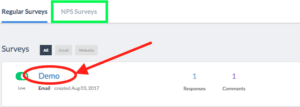
Click on the title of your survey (red circle above). If you ran an NPS survey, you will need to select the “NPS Surveys” button first (green box above).
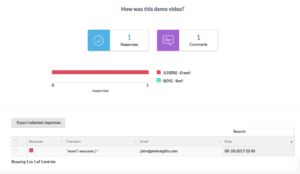
After clicking, you will be able to see your real-time results and any additional comments.
Make sure you delete this response so it doesn’t affect your survey stats.
And that’s all there is to it!
TL;DR:
Here’s the video of me doing the same process: